
The intarsia resource round-up
Let's begin with a bit of a reframe. Taking on an intarsia project, especially a complicated one with lots of bobbins, may require you to give up some of your most deeply held expectations about what a knitting project is and should be — and that's okay...
Let's begin with a bit of a reframe. Taking on an intarsia project, especially a complicated one with lots of bobbins, may require you to give up some of your most deeply held expectations about what a knitting project is and should be — and that's okay. You will probably not be working on this project while you are in the waiting room at the doctor's office. You will never reach a point where you are not referring to the pattern every. single. row. And while you may find a kind of rhythm in the progression of knitting while moving bobbins, it certainly will be very different from the unbroken flow you are accustomed to for most knitting projects.
Instead, I think it's helpful to recategorize intarsia as a type of weaving, or maybe even painting with yarn. To paint, you need a workstation (table), paints (yarns), a canvas (your knitting), brushes (bobbins and needles), and probably some kind of reference (the pattern).
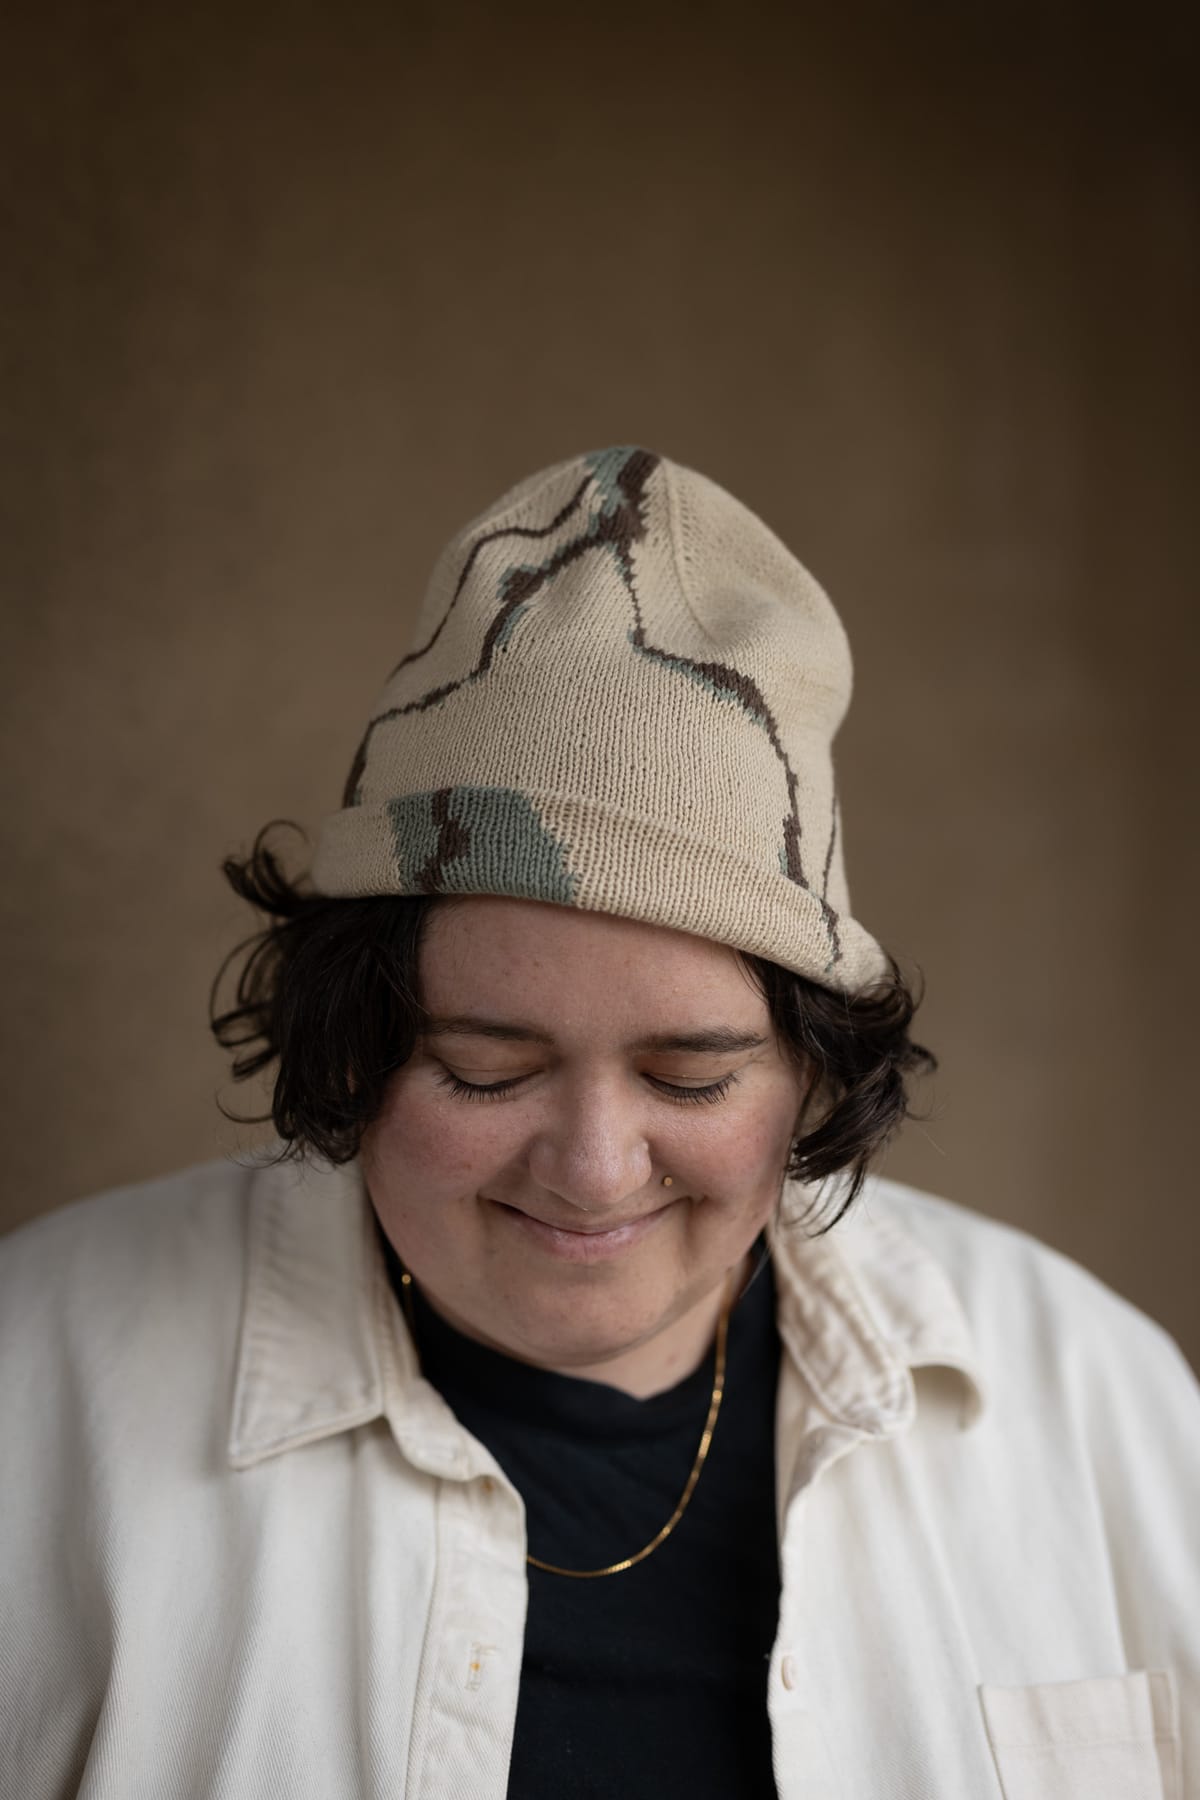
In fact, the painting metaphor feels especially apt because it's clear to me that Marble — my newest intarsia design, out now! — was born from my growing obsession with watercolor. Intarsia is a means of achieving with yarn the same kind of limitless, organic, abstract color blocking that I find so enchanting when painting.

MARBLE, the reversible all-over intarsia beanie, was released on Friday, December 26. Click here to download a free PDF with all the sizing and yarn details before you purchase the pattern!
Ok, so maybe you have made it this far but you have been confused the whole time because you have no idea what intarsia is. I got you! There are (broadly) two ways of creating motifs in different yarn colors across a piece of knitting:
- Stranded or "Fair Isle," which carries multiple yarns across every round of knitting, creating the eponymous "strands" or "floats" across the back of the work, usually worked in the round
- Intarsia, which employs multiple yarns worked individually in separate blocks of color across a single row, usually worked flat
Intarsia sometimes has a bit of a bad rap in the knitting world, but I think this is mostly because knitters bring all their predetermined expectations (see above) and find it lacking. If, instead, you approach intarsia with an open mind, and you are enthusiastic about its creative potential, there are plenty of amazing resources for getting started with this technique.
Bobbins
Any intarsia pattern that has more than 2 or 3 blocks of color will require you to create small bobbins with specified amounts of yarn for each segment of the pattern. Here are some things you can use for bobbins:
- Plastic yarn bobbins, like these "E-Z Bobbins" from Black Squirrel
- Laundry clips, as recommended in this reddit post
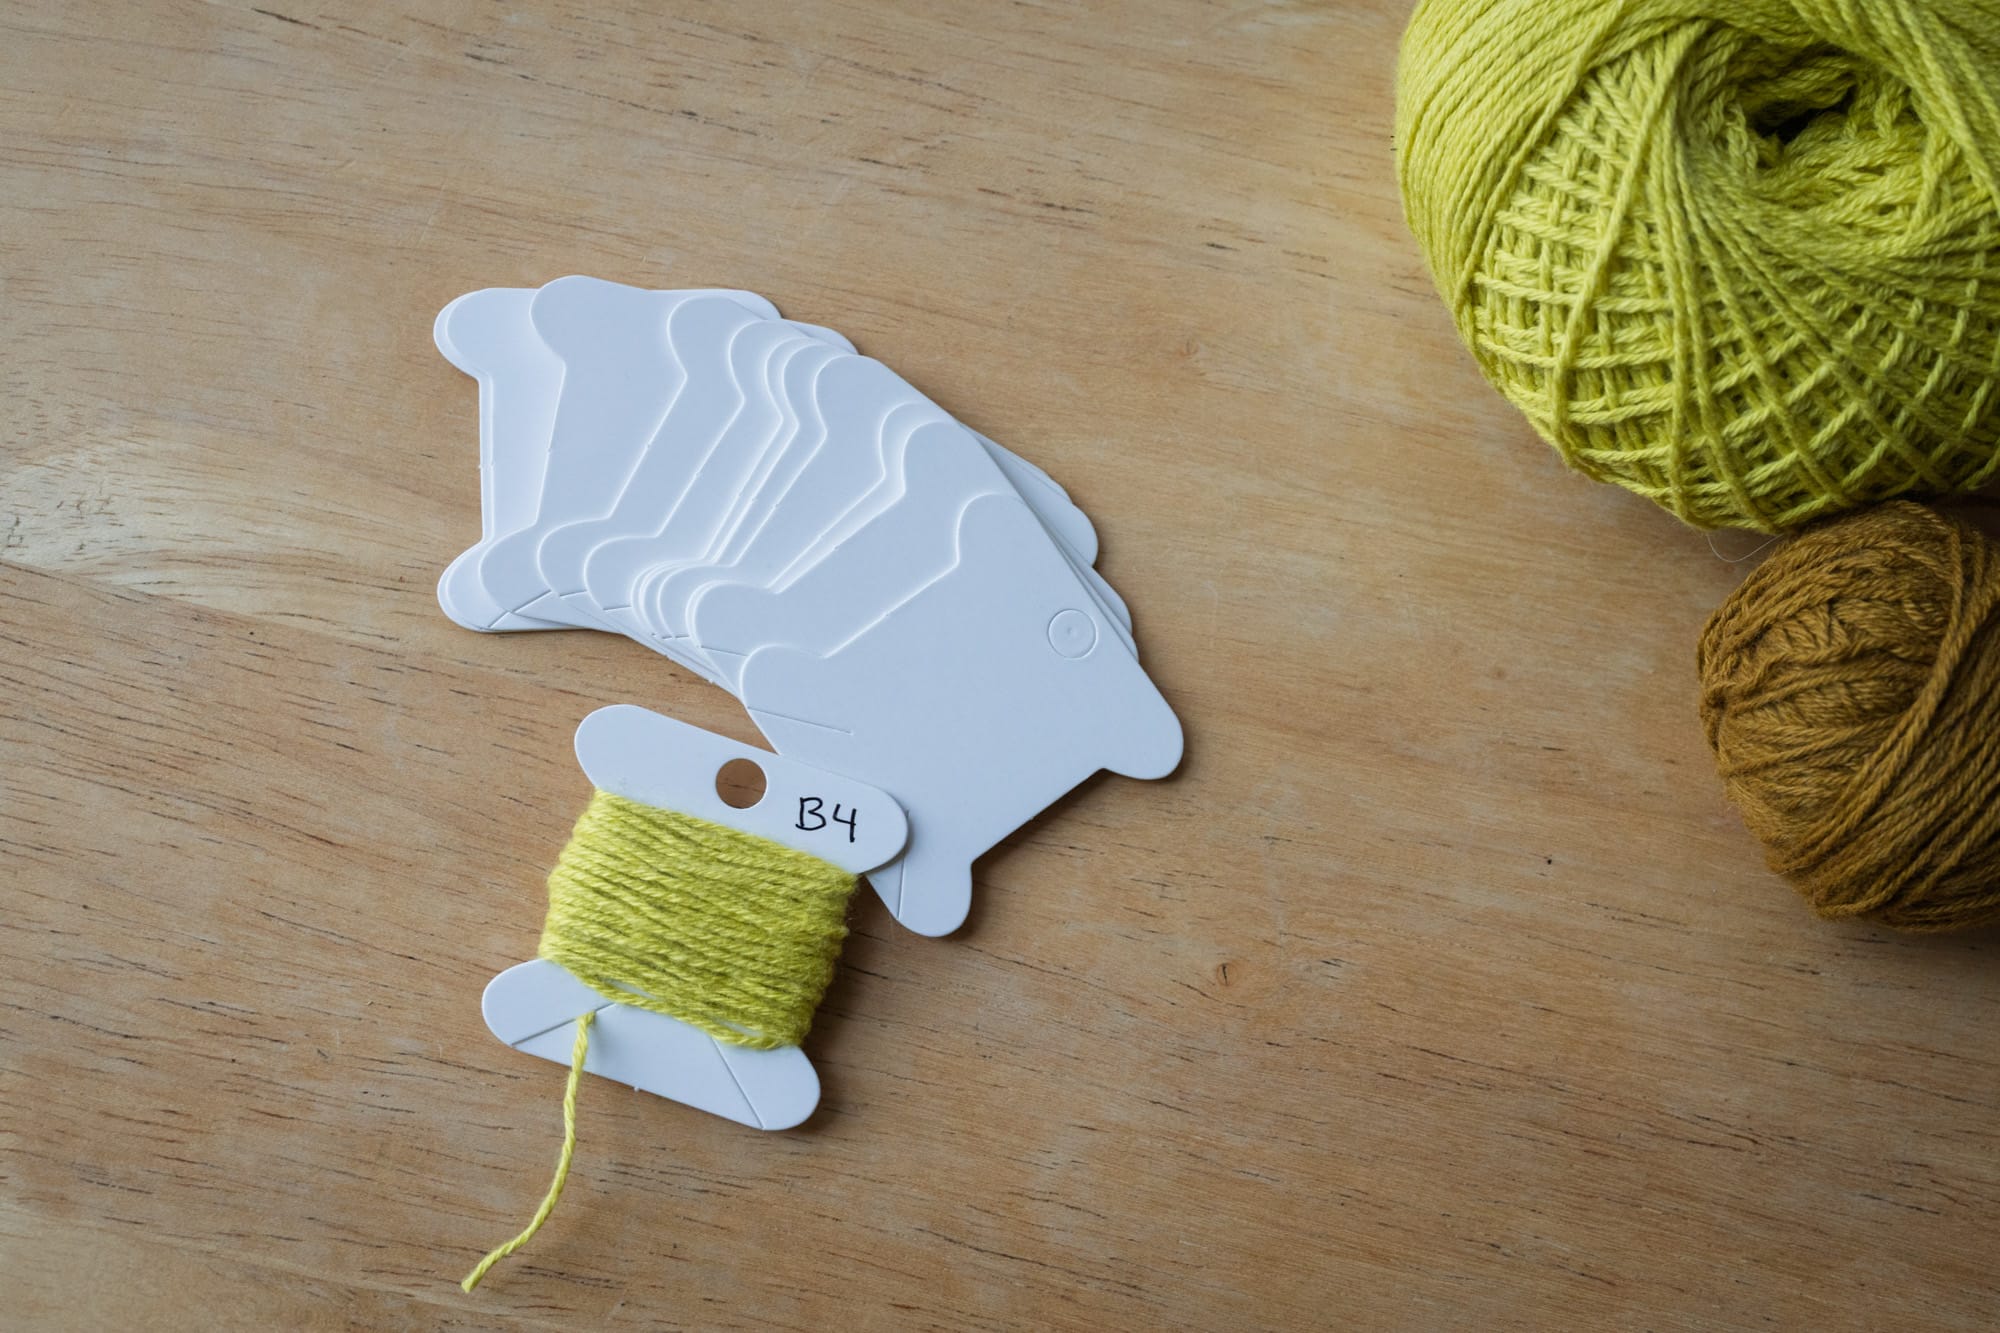
- Plastic or cardboard embroidery floss bobbins
- DIY hand-wound "butterfly" bobbins
Whatever you choose, my main recommendation (specifically for the Marble beanie) is that you choose bobbins that you are somehow able to label (you could maybe add a tiny tag to the yarn wrapped around the "butterfly" in the last example). Marble, for example, includes 4 bobbins in each of 3 different yarn colors, and it is extremely helpful to be able to tell which bobbin is which at just a glance.
Set up

I highly recommend that you work intarsia projects at a table, with all your bobbins lined up neatly in front of you, behind your work. I have sometimes used a tray, with all my bobbins pushed up against the edge, to keep everything organized and to keep my bobbins from sliding across or off the table.
I like to have my bobbins FREE — that is, not attached to anything or to each other — because I like the rhythm I get into when I'm working an intarsia pattern and I reach under the yarn I've just finished to grab the bobbin for the next yarn and put it over the previous yarn and back into its spot on the table, neatly and easily "catching" the previous yarn on the back of the work (more on that in a minute).
"Catching" my previous yarn on the back of the work by pulling the new bobbin under and then over the previous yarn
If, however, you prefer the idea of keeping all your bobbins anchored, this tutorial from KC Knitting Co offers a really cool DIY set-up with binder clips on a plastic bin. NOTE: This set-up requires wrapping each yarn twice so you can avoid moving the bobbins each row. If you choose to use it for Marble, you will still need to move the bobbins sometimes, because there are parts of the pattern where a bobbin has only one stitch in a row, so you won't be able to wrap twice.
Technique
Ok, time to get into the knitty gritty! The most important technique in intarsia is "wrapping" or "twisting" the yarns together when you switch yarns in the middle of a row, which is the only way to avoid holes in your work. Right after you work the last stitch in the old yarn, you need to pass the yarn tail from the old yarn over the top of the new yarn, pushing it right up against the wrong side of the work. When you work the first stitch in the new yarn, the old yarn will be “caught” under the new yarn.
- This tutorial from Tin Can Knits is extremely clear for showing what this looks like at its most basic, but the technique continues to apply even as you move into more complex designs.
- If you decided to follow the set-up from KC Knitting Co above, here is the video showing her technique for catching the yarns.
- Modern Daily Knitting has a whole series on Intarsia on YouTube, which you can find here. In particular, for Marble, the first video (Intarsia Joins) and the last two videos (Putting Yarn in the Right Place for Intarsia and Intarsia Joins on the Diagonal) would be especially helpful.
Beginner projects
If you are intrigued by intarsia but not quite ready to jump all the way into a project with 12 bobbins (Marble!), here a few more beginner friendly patterns:
- Color Quadrant Cap by James N Watts
- Hemispheres Hat by KC Knitting Co
- Mooncrush Tank by me :)
That said, whenever anyone asks me if a project is suitable for their skill level, I always answer by saying that desire is a powerful motivator. I am much more likely to learn new skills when I obsessed with making/having a particular thing than I am when I choose to make something just because it falls within my perceived skill level. Know yourself, evaluate your current capacity for frustration/learning as you go, and make a decision that reflects where you're at!
About Marble
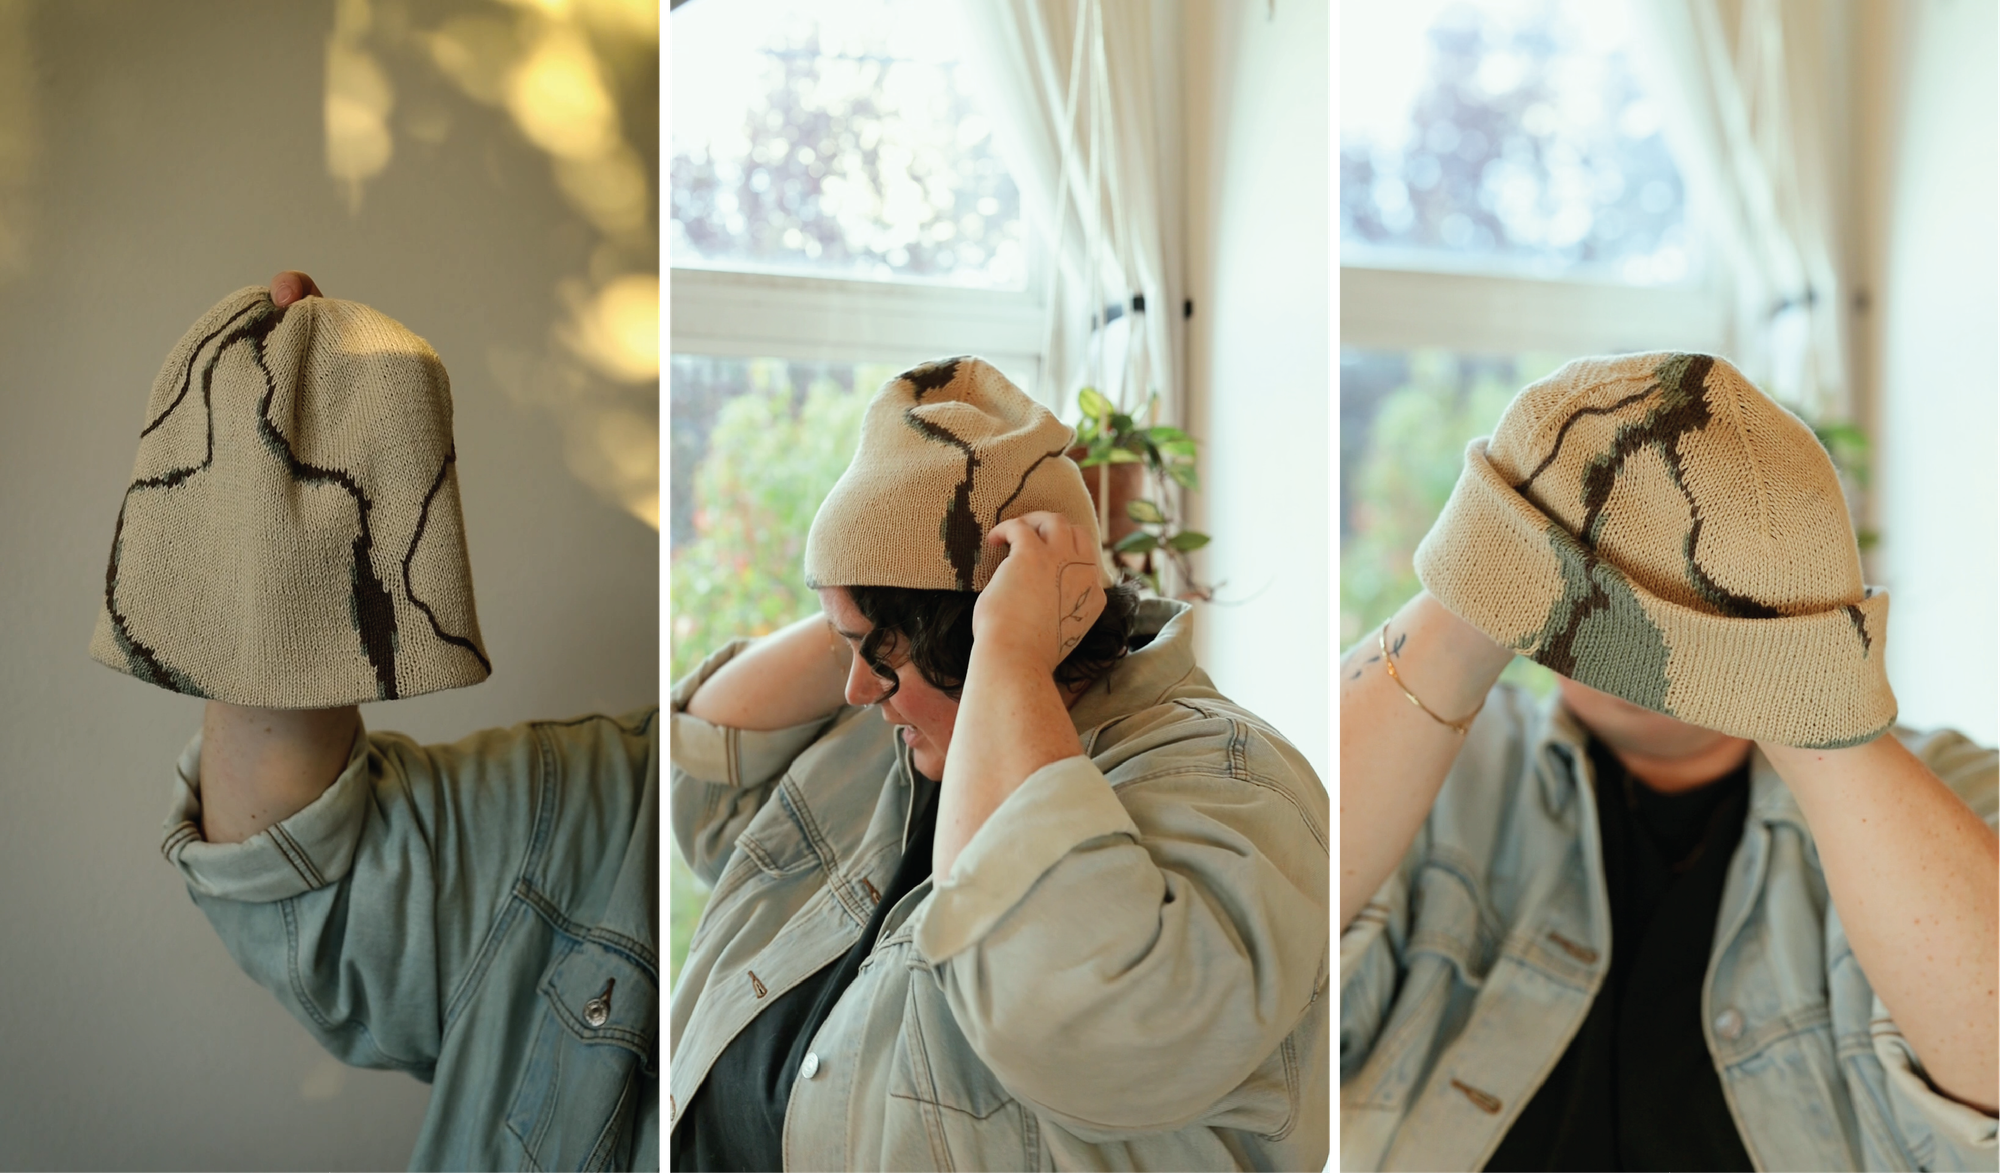
Designing, knitting, and writing this pattern was such a fun obsession for me — seeing the design come to life row by row, getting into the meditative rhythm of moving the bobbins, and then finally getting to style and wear the beanie soooo may different ways — I really can't exaggerate just how much I love this pattern!
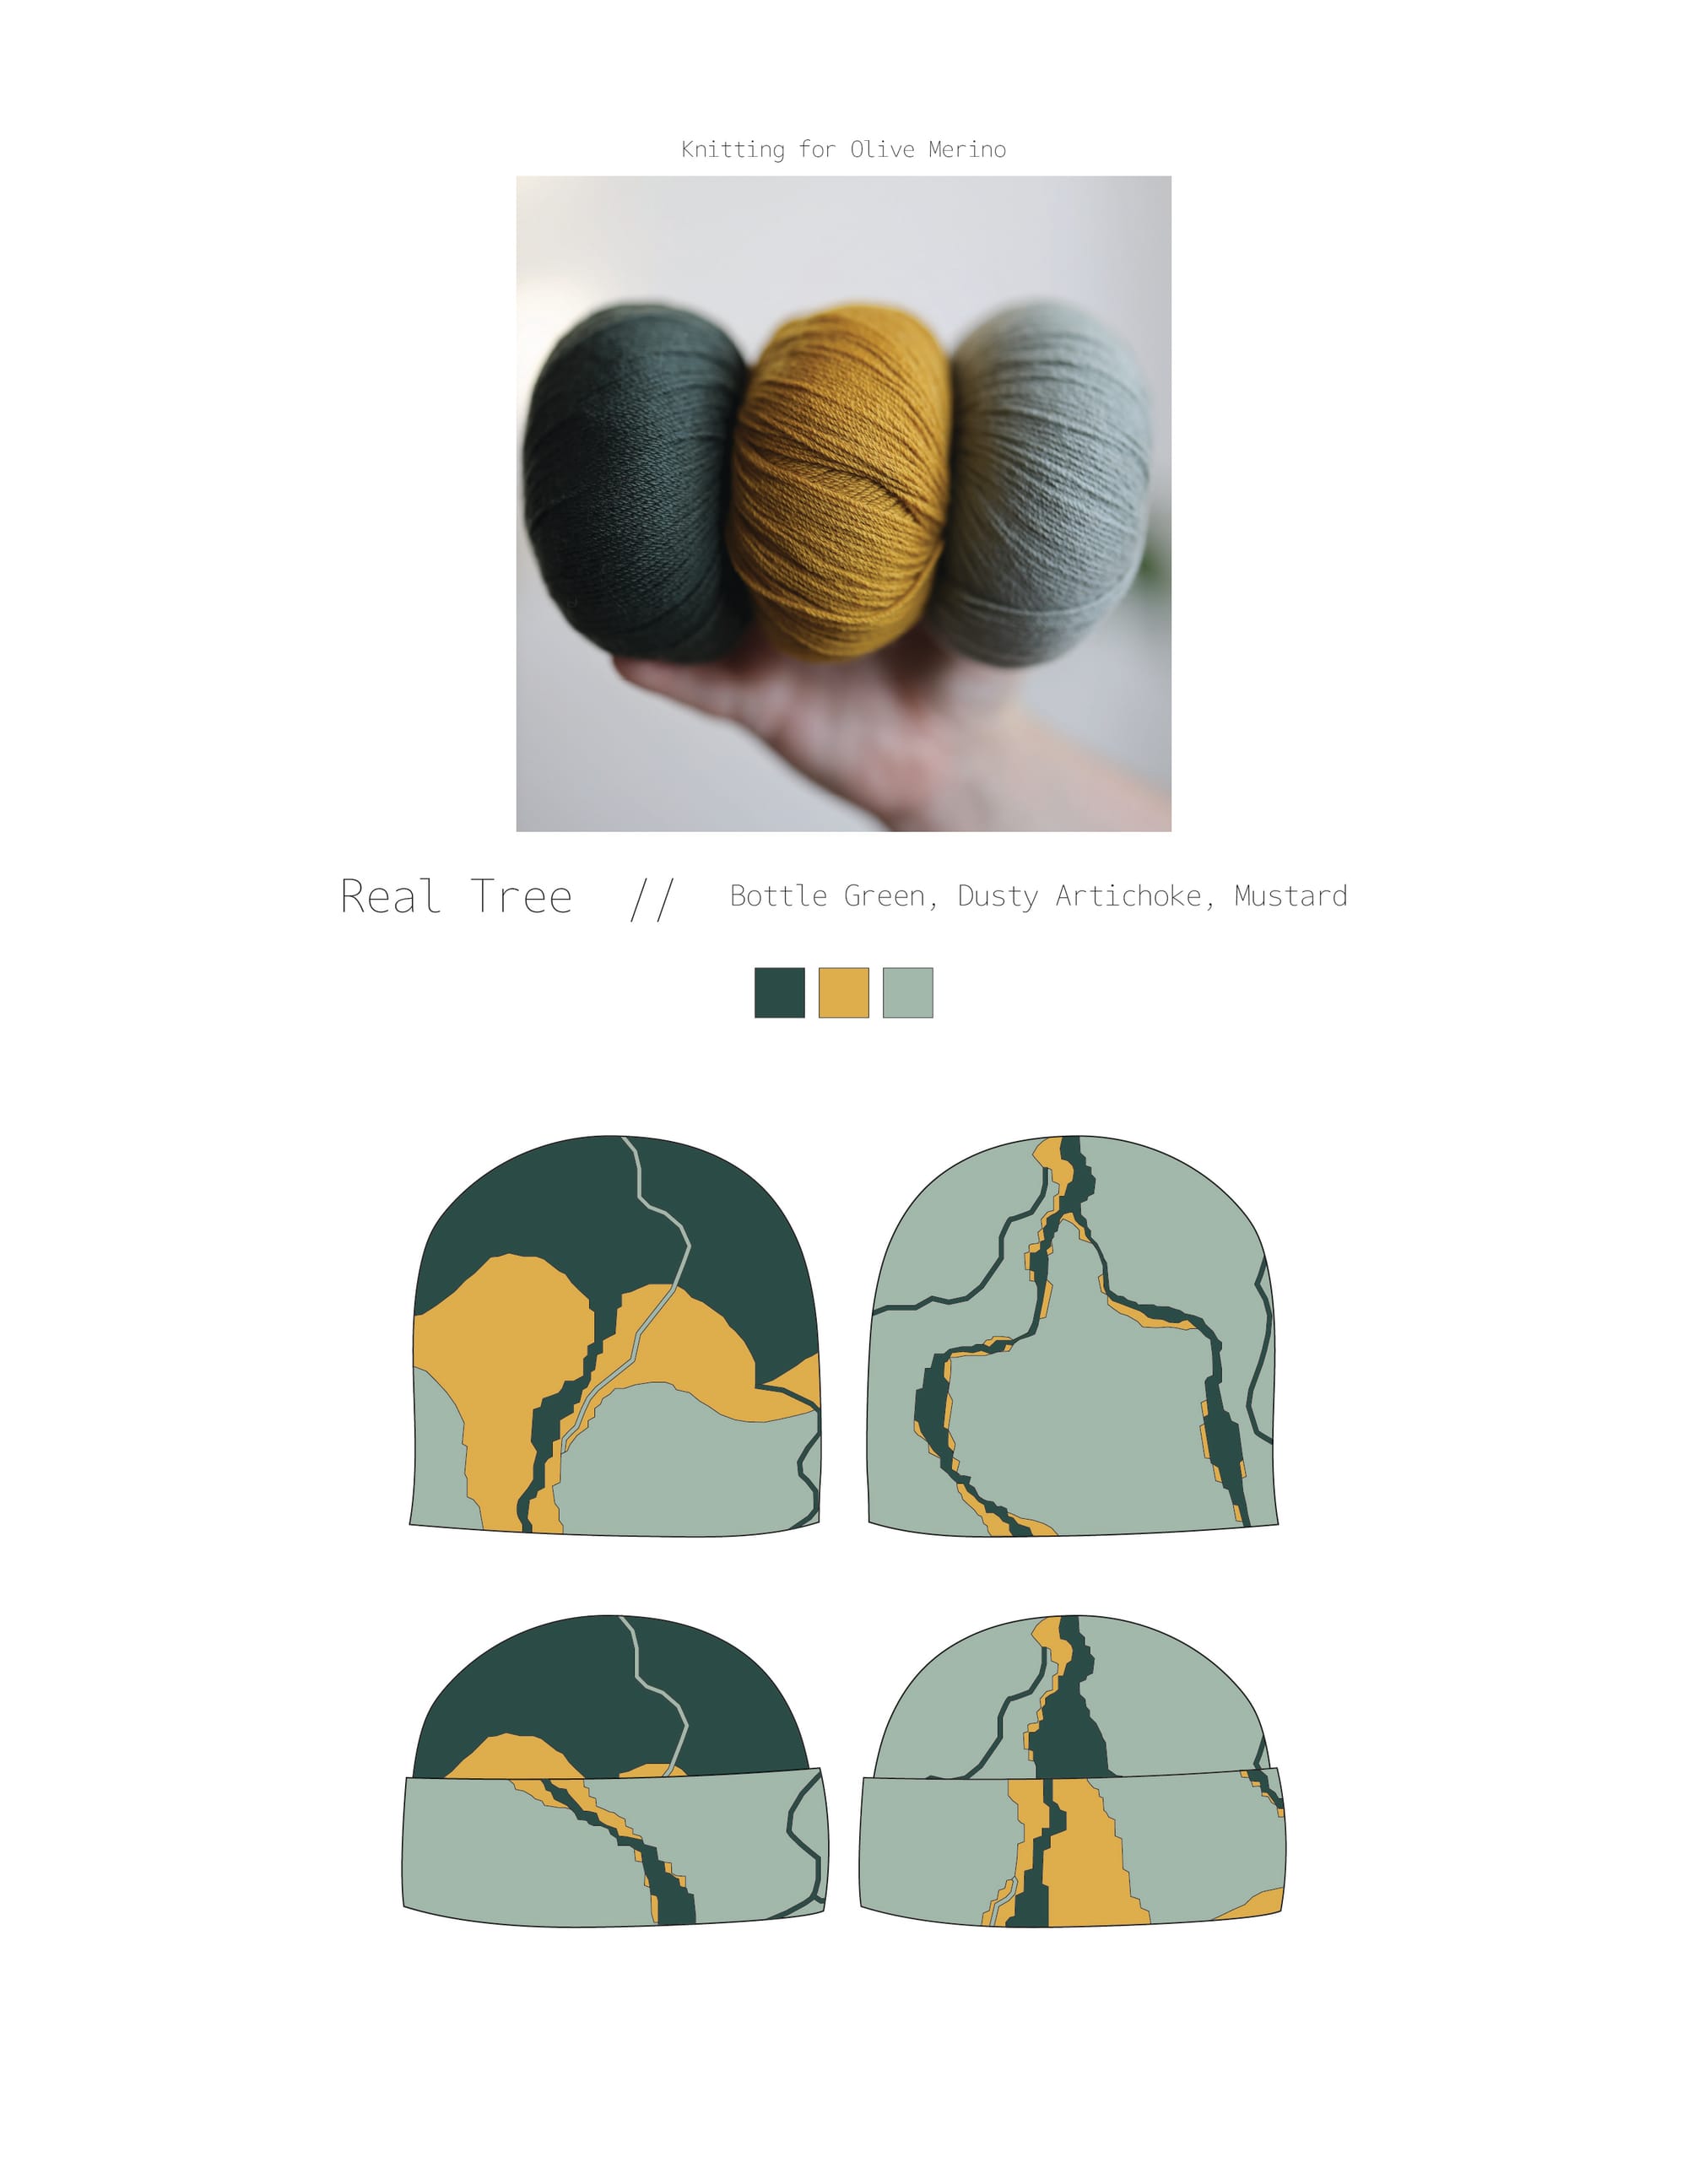
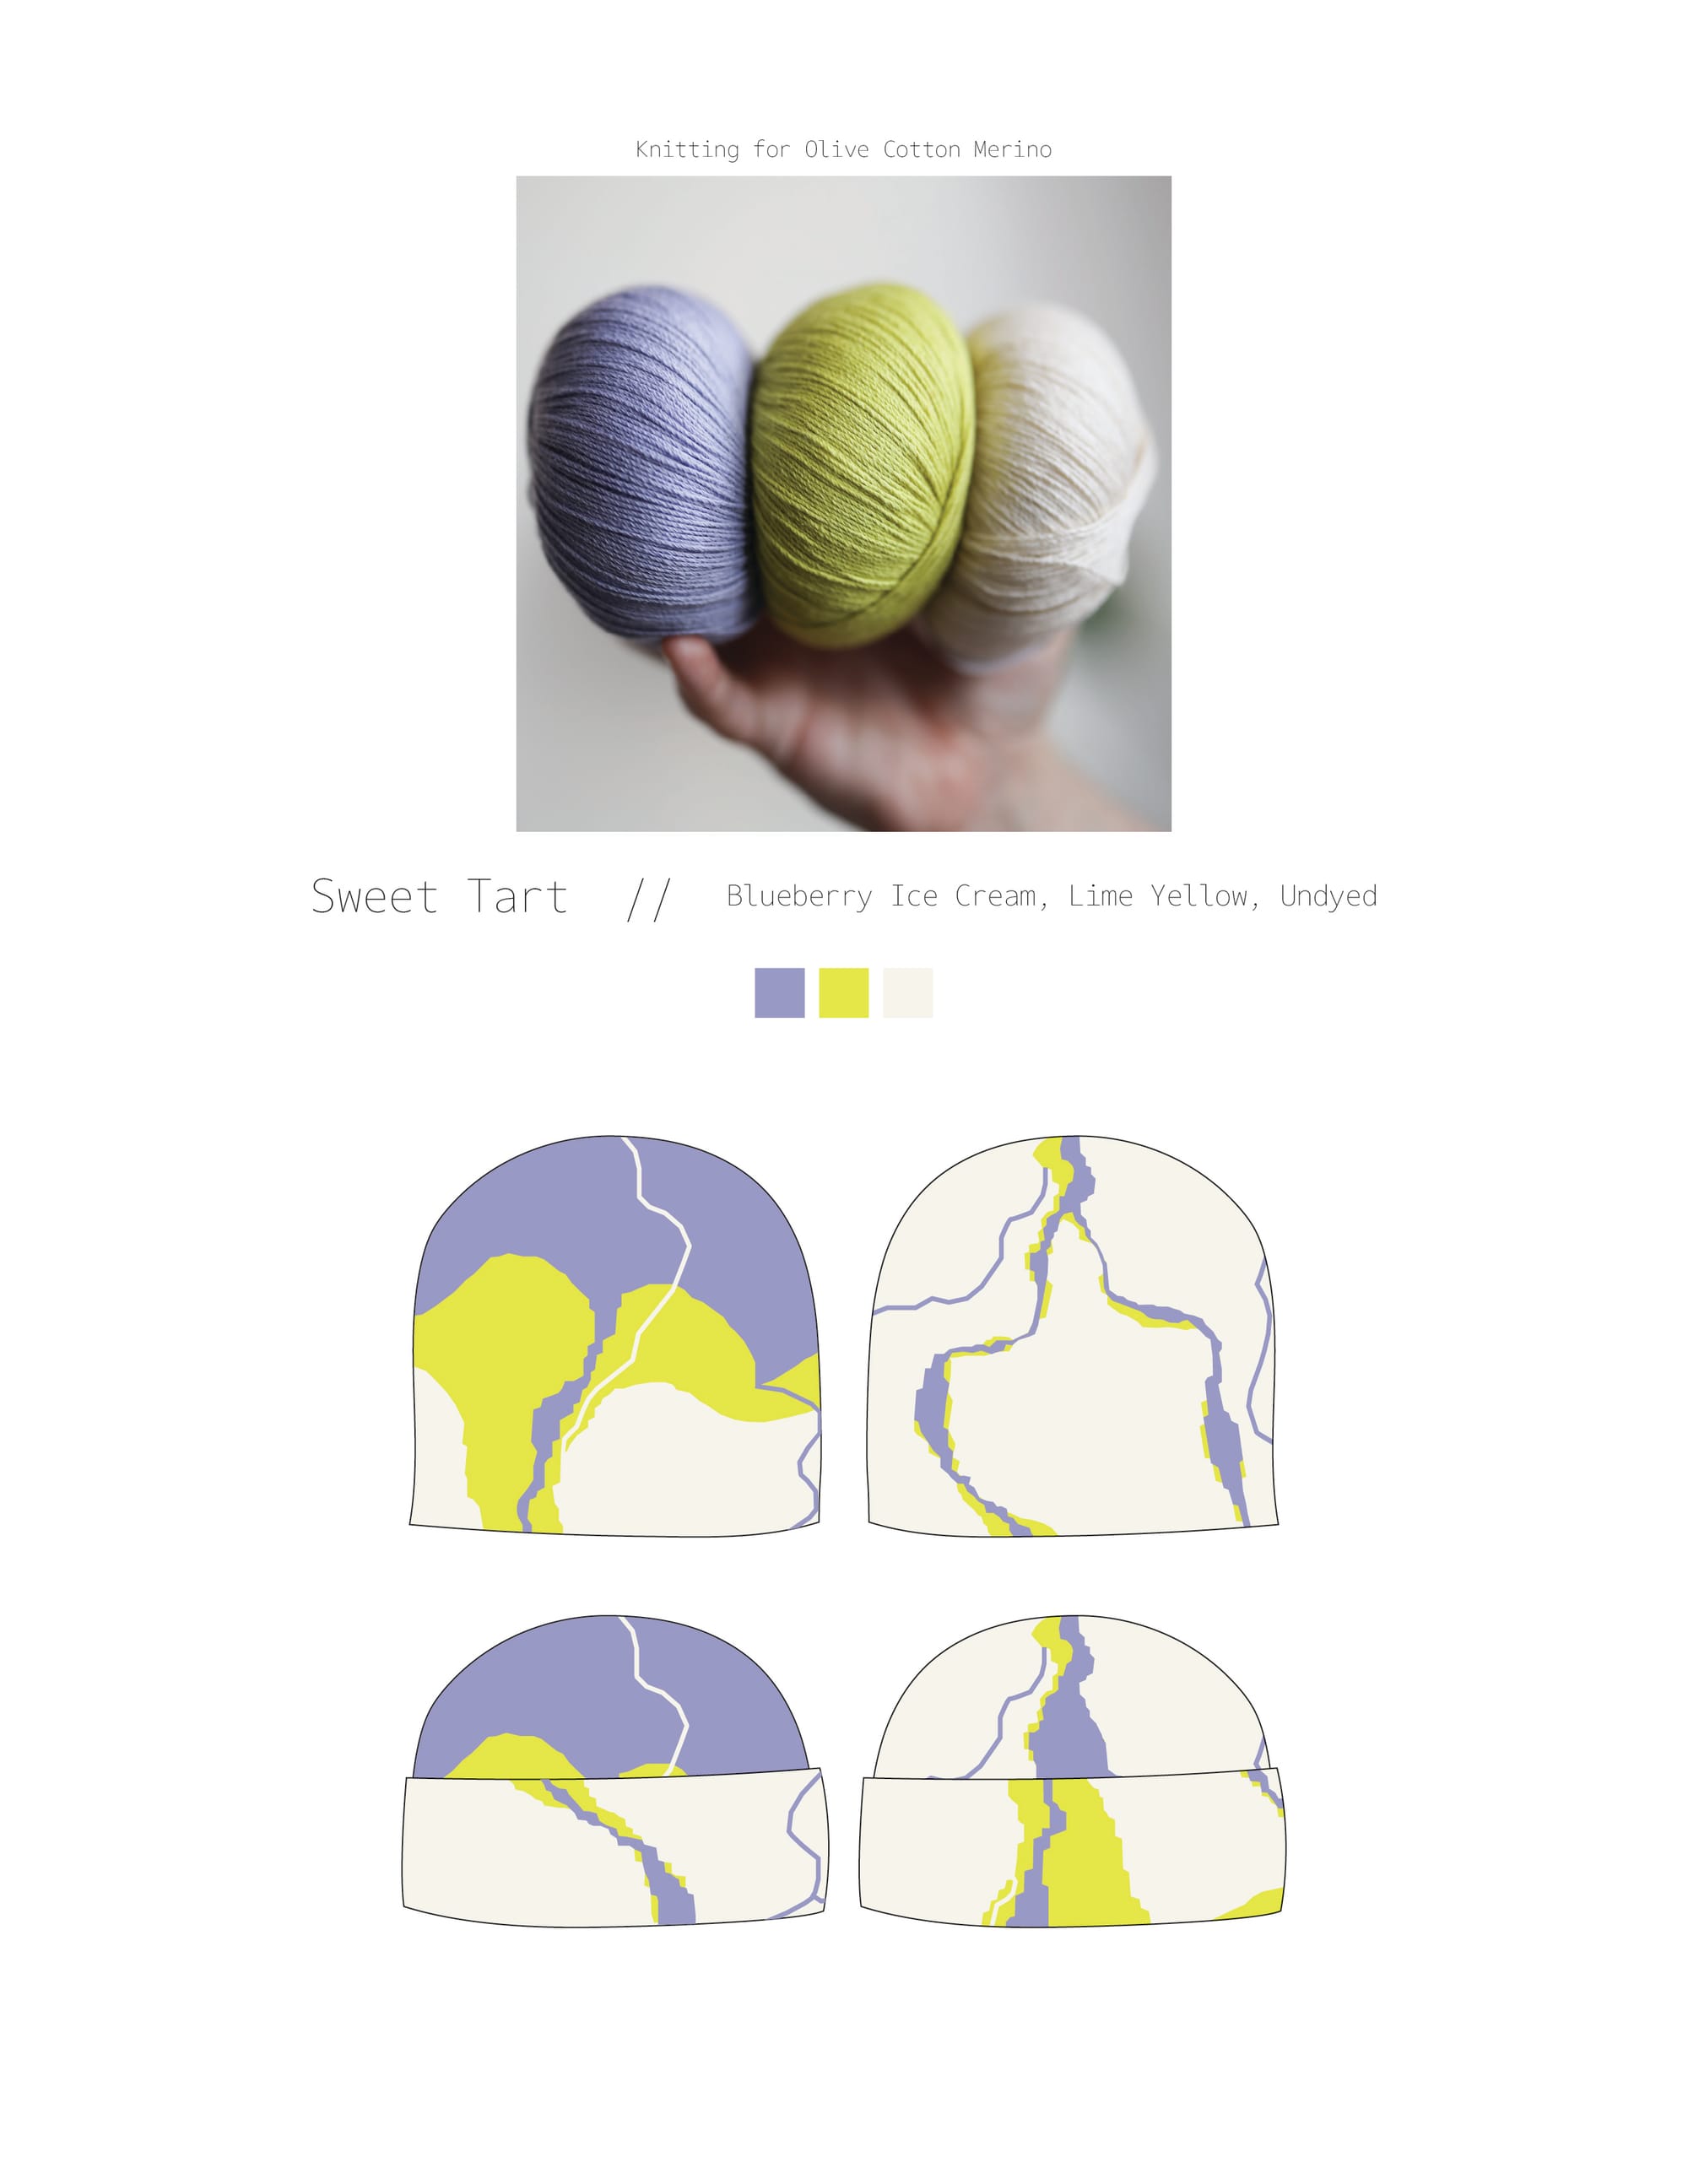
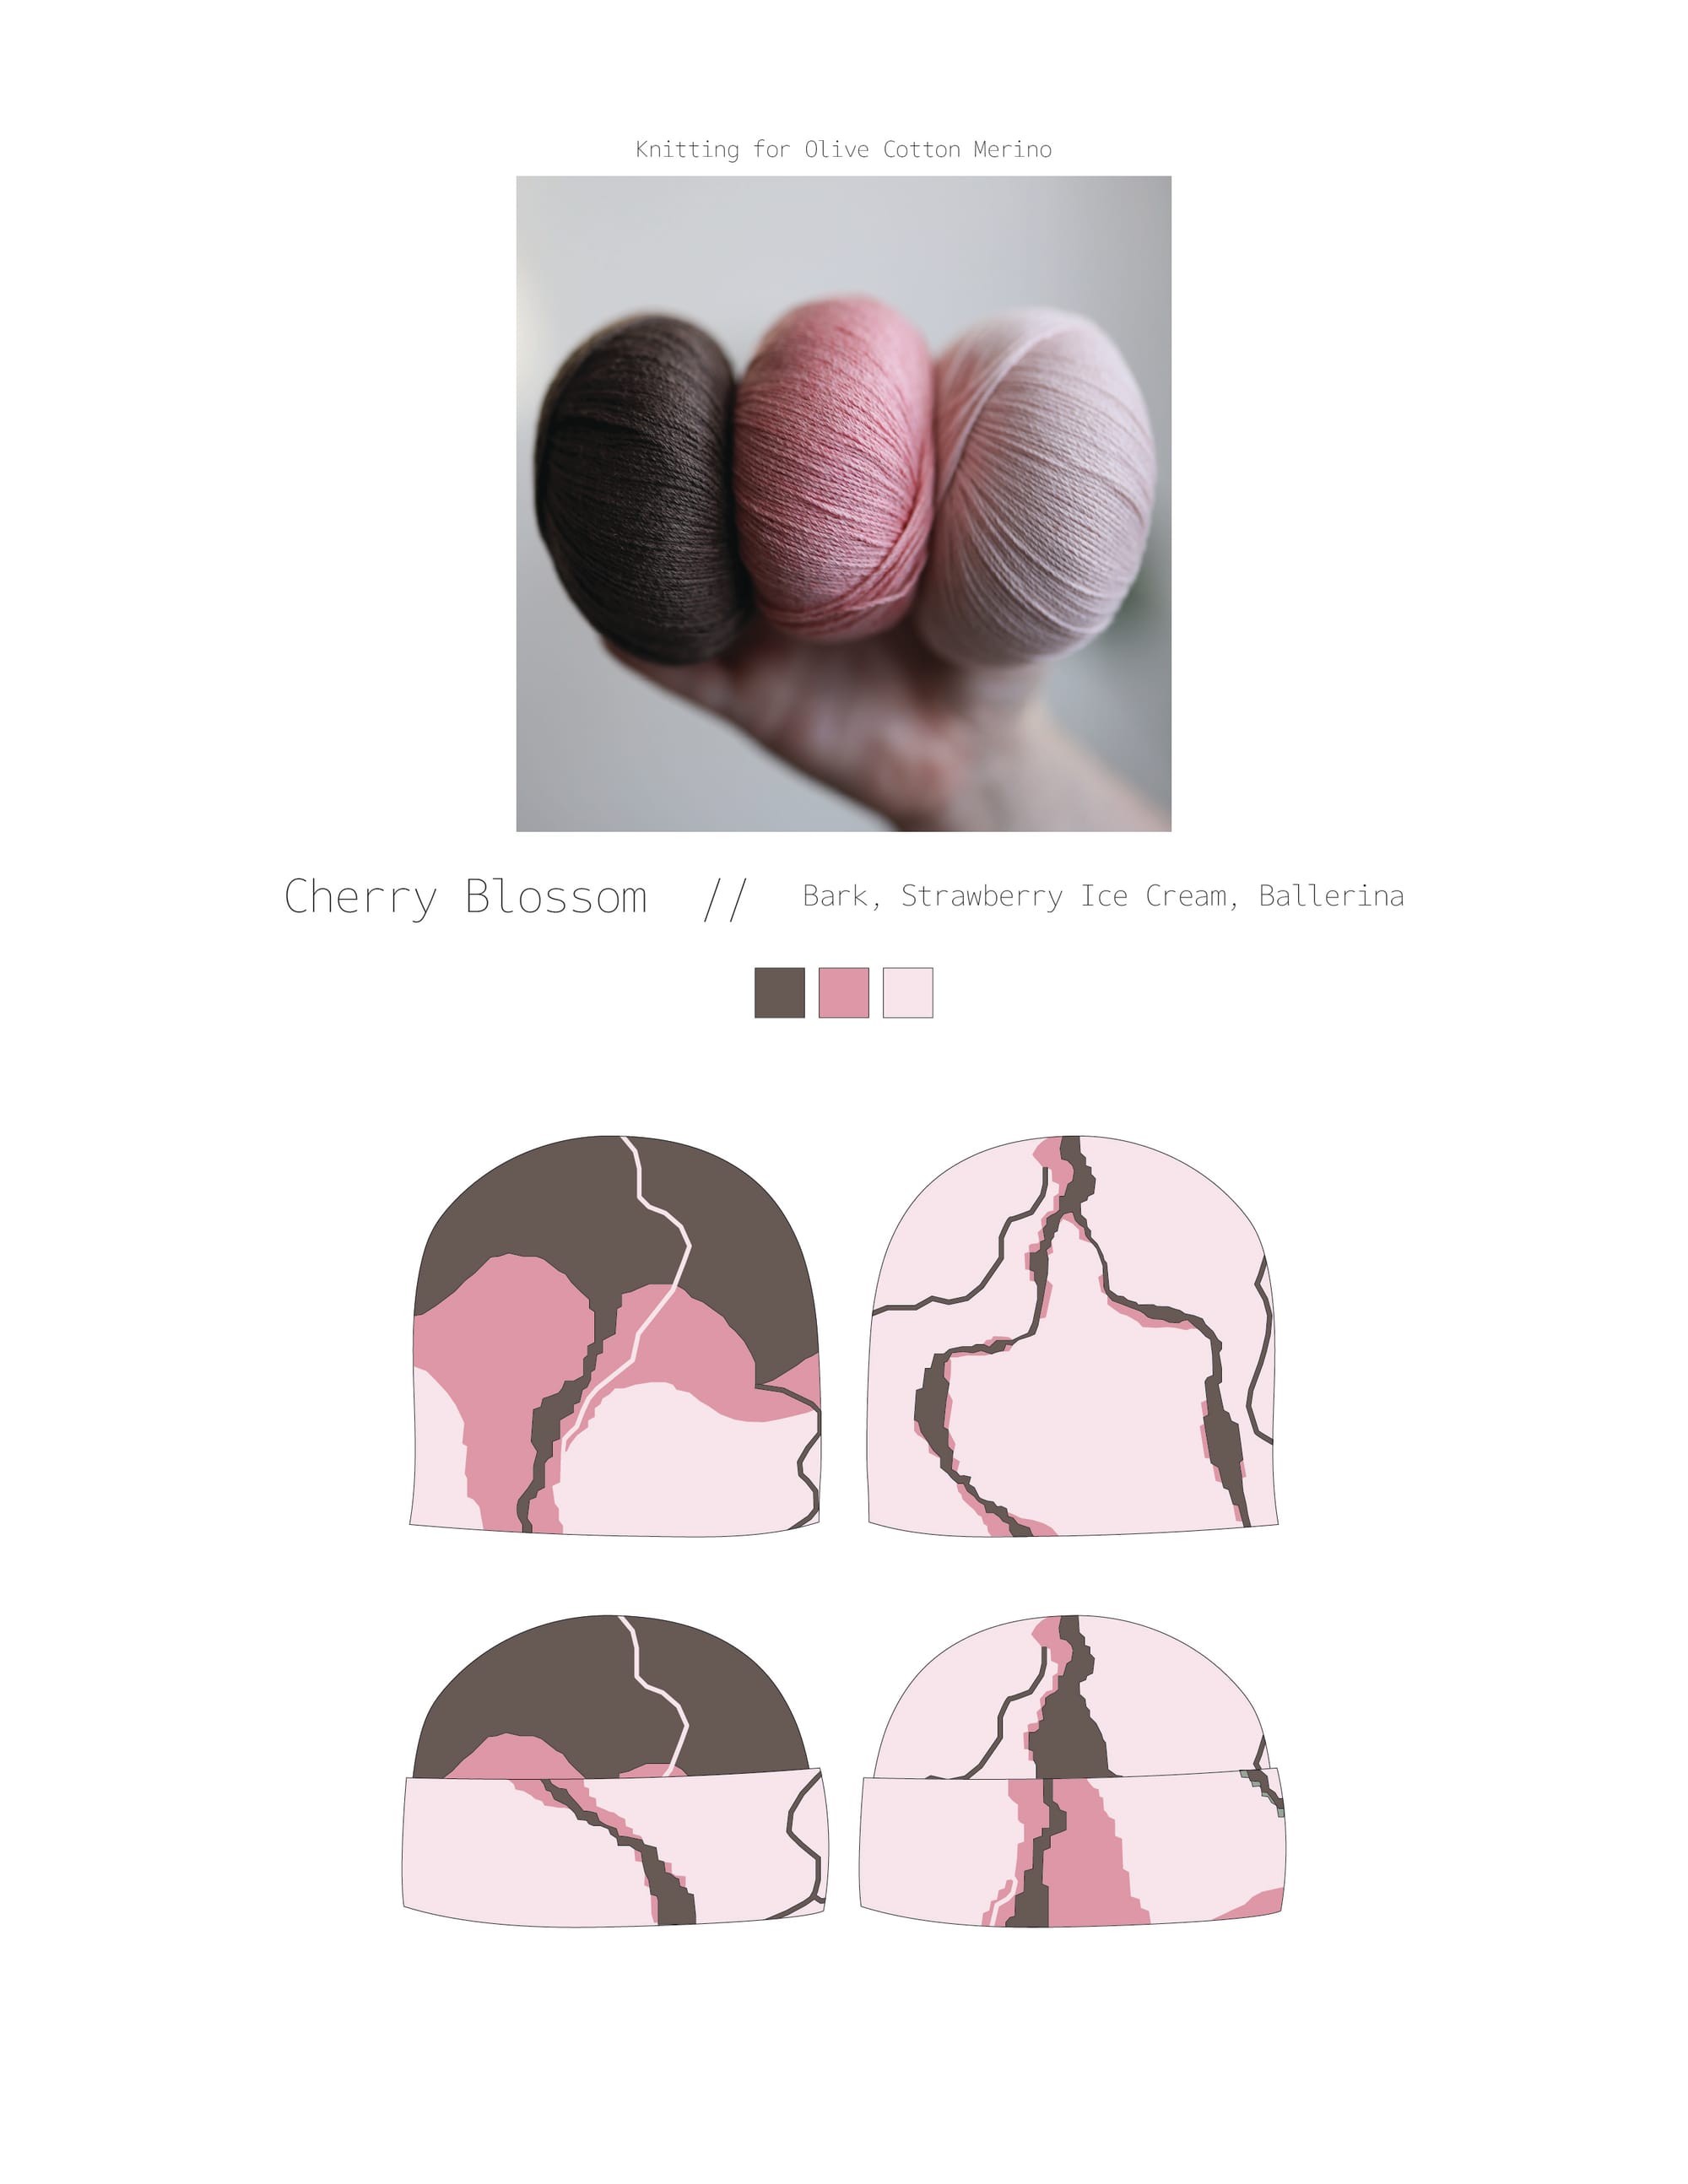
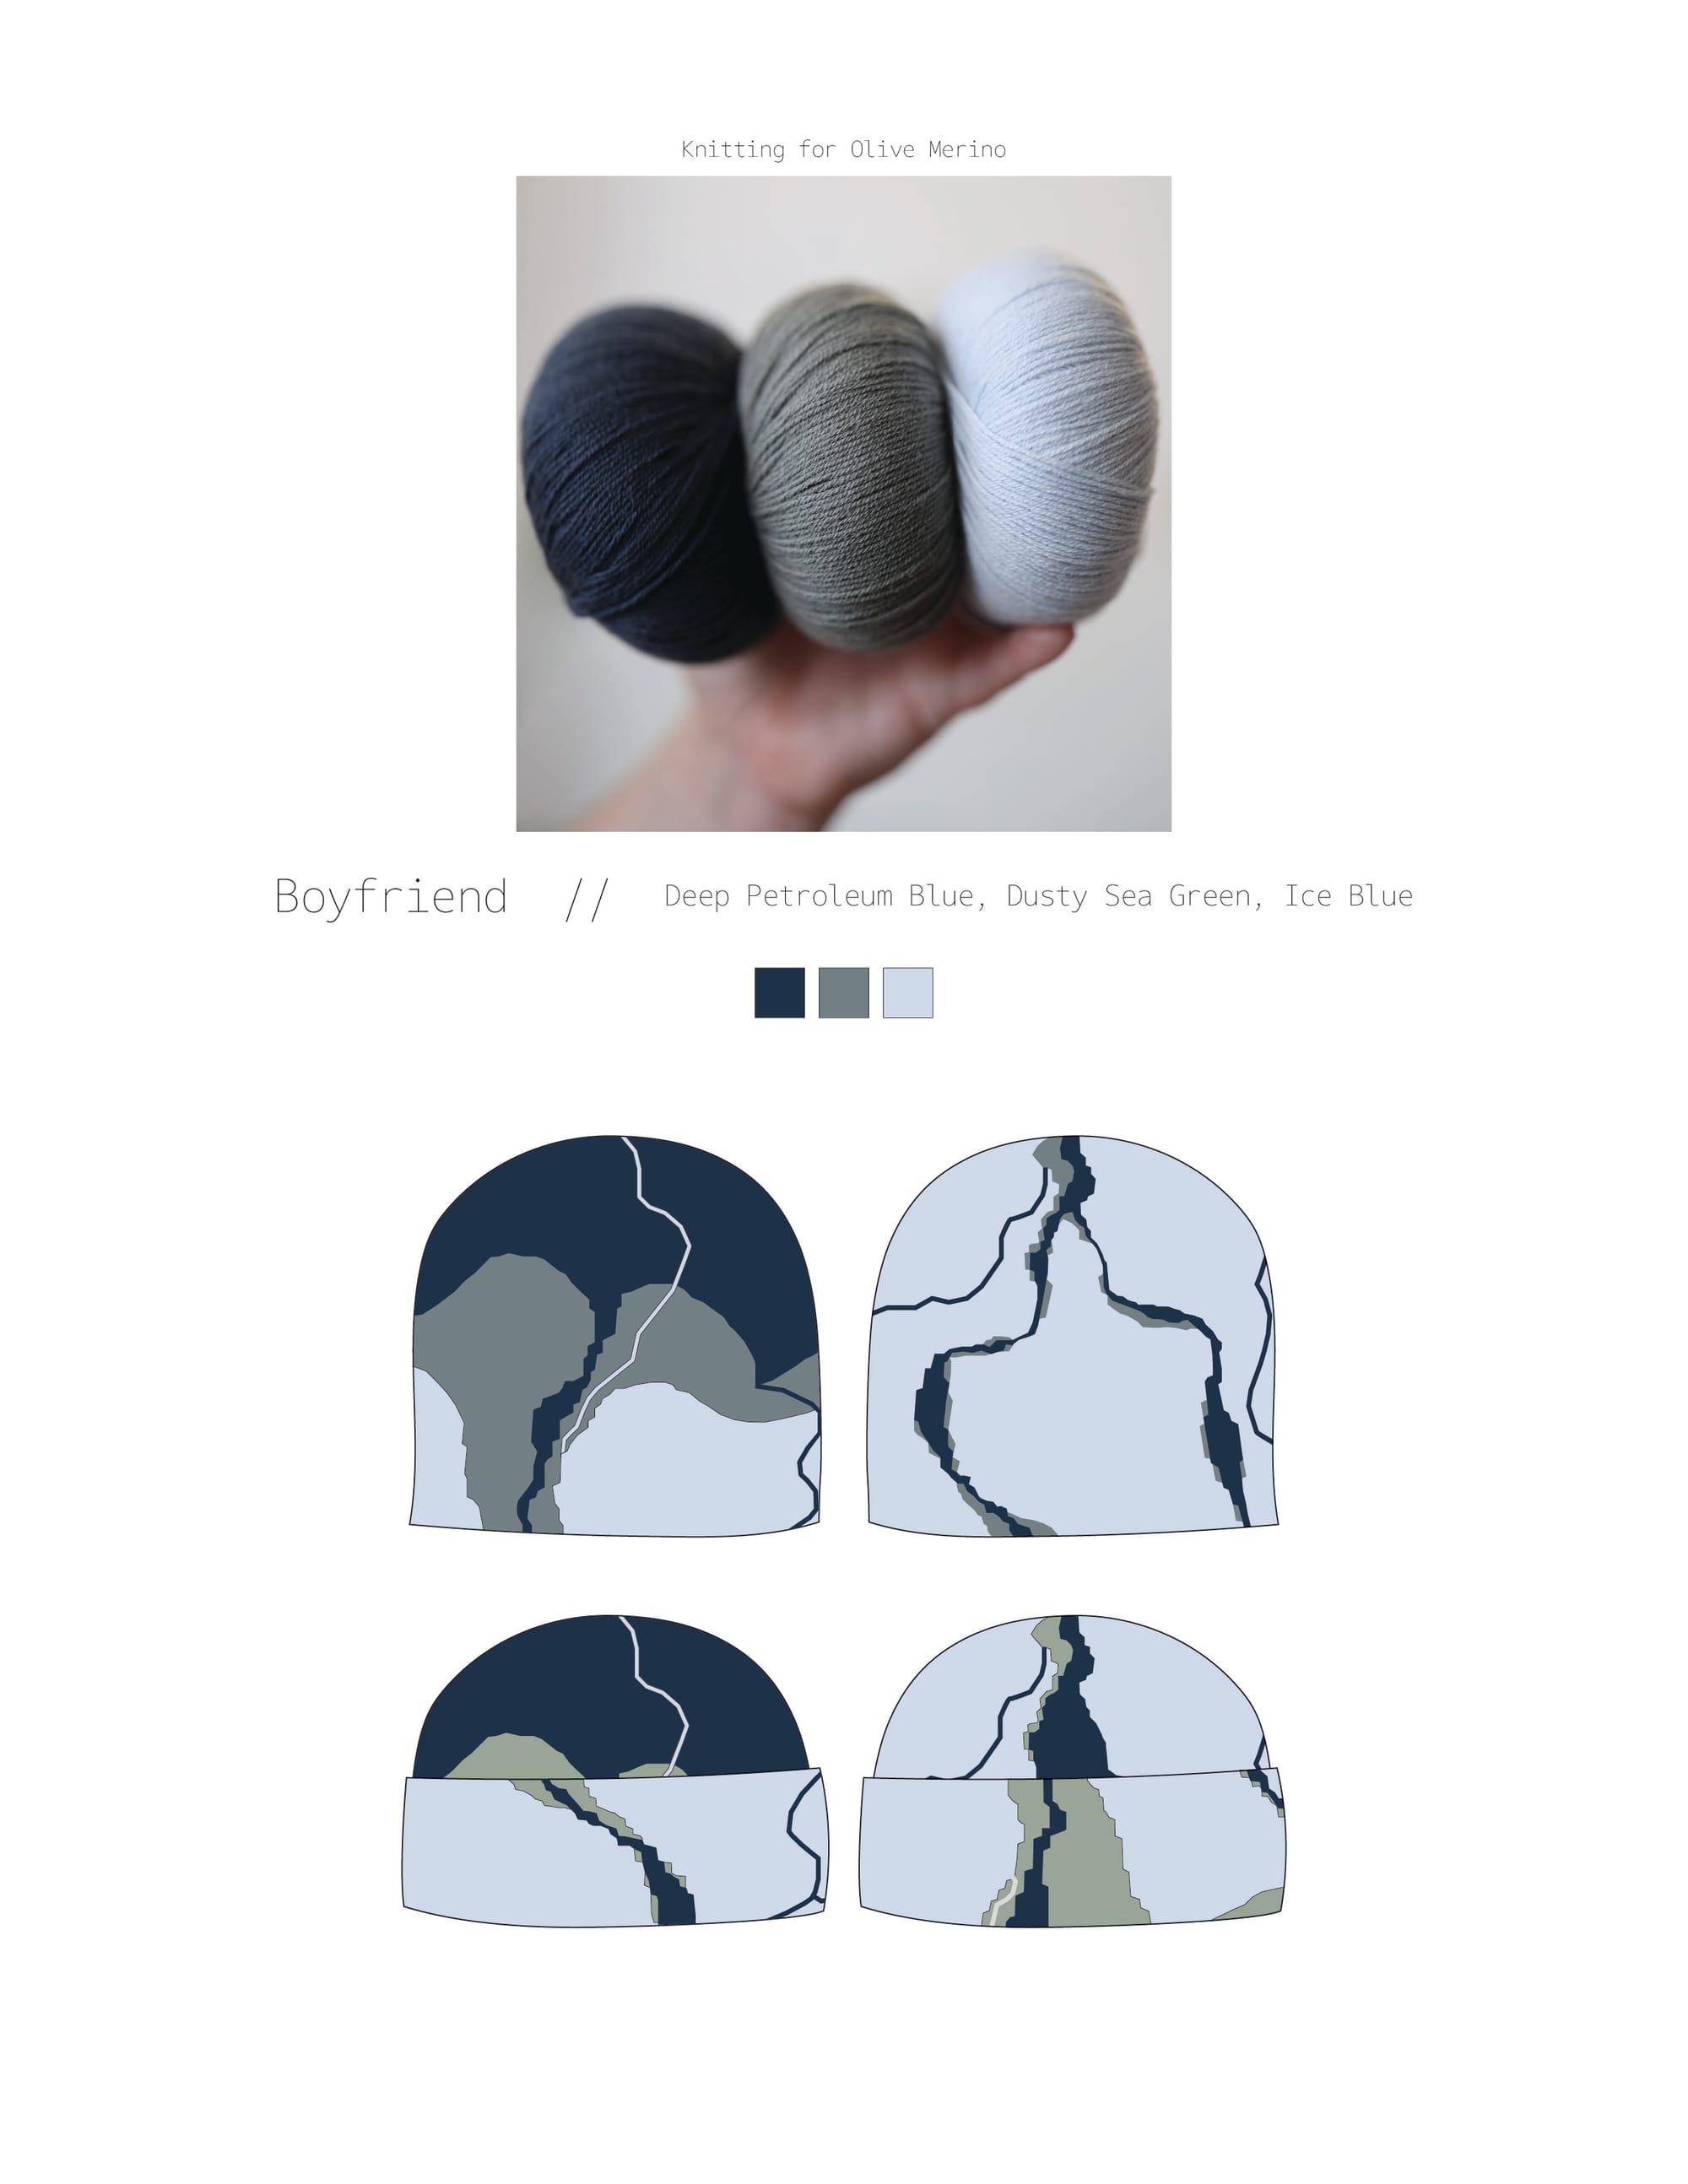
I am so grateful to Black Squirrel for supporting me as I worked through this design. I put together a range of sample colorways and made some illustrations to show what the beanie might look like, and the shop is selling kits (with complimentary cardboard bobbins) if you want to pick one of my colorways.
Here are the colorways I put together, all featuring Knitting for Olive fingering weight yarns:


The pattern comes out Friday, December 26, and I can't wait to start seeing Marble beanies pop up on my feed. If you want to prepare to cast on Friday, you can download a free PDF with all the sizing and yarn details here:
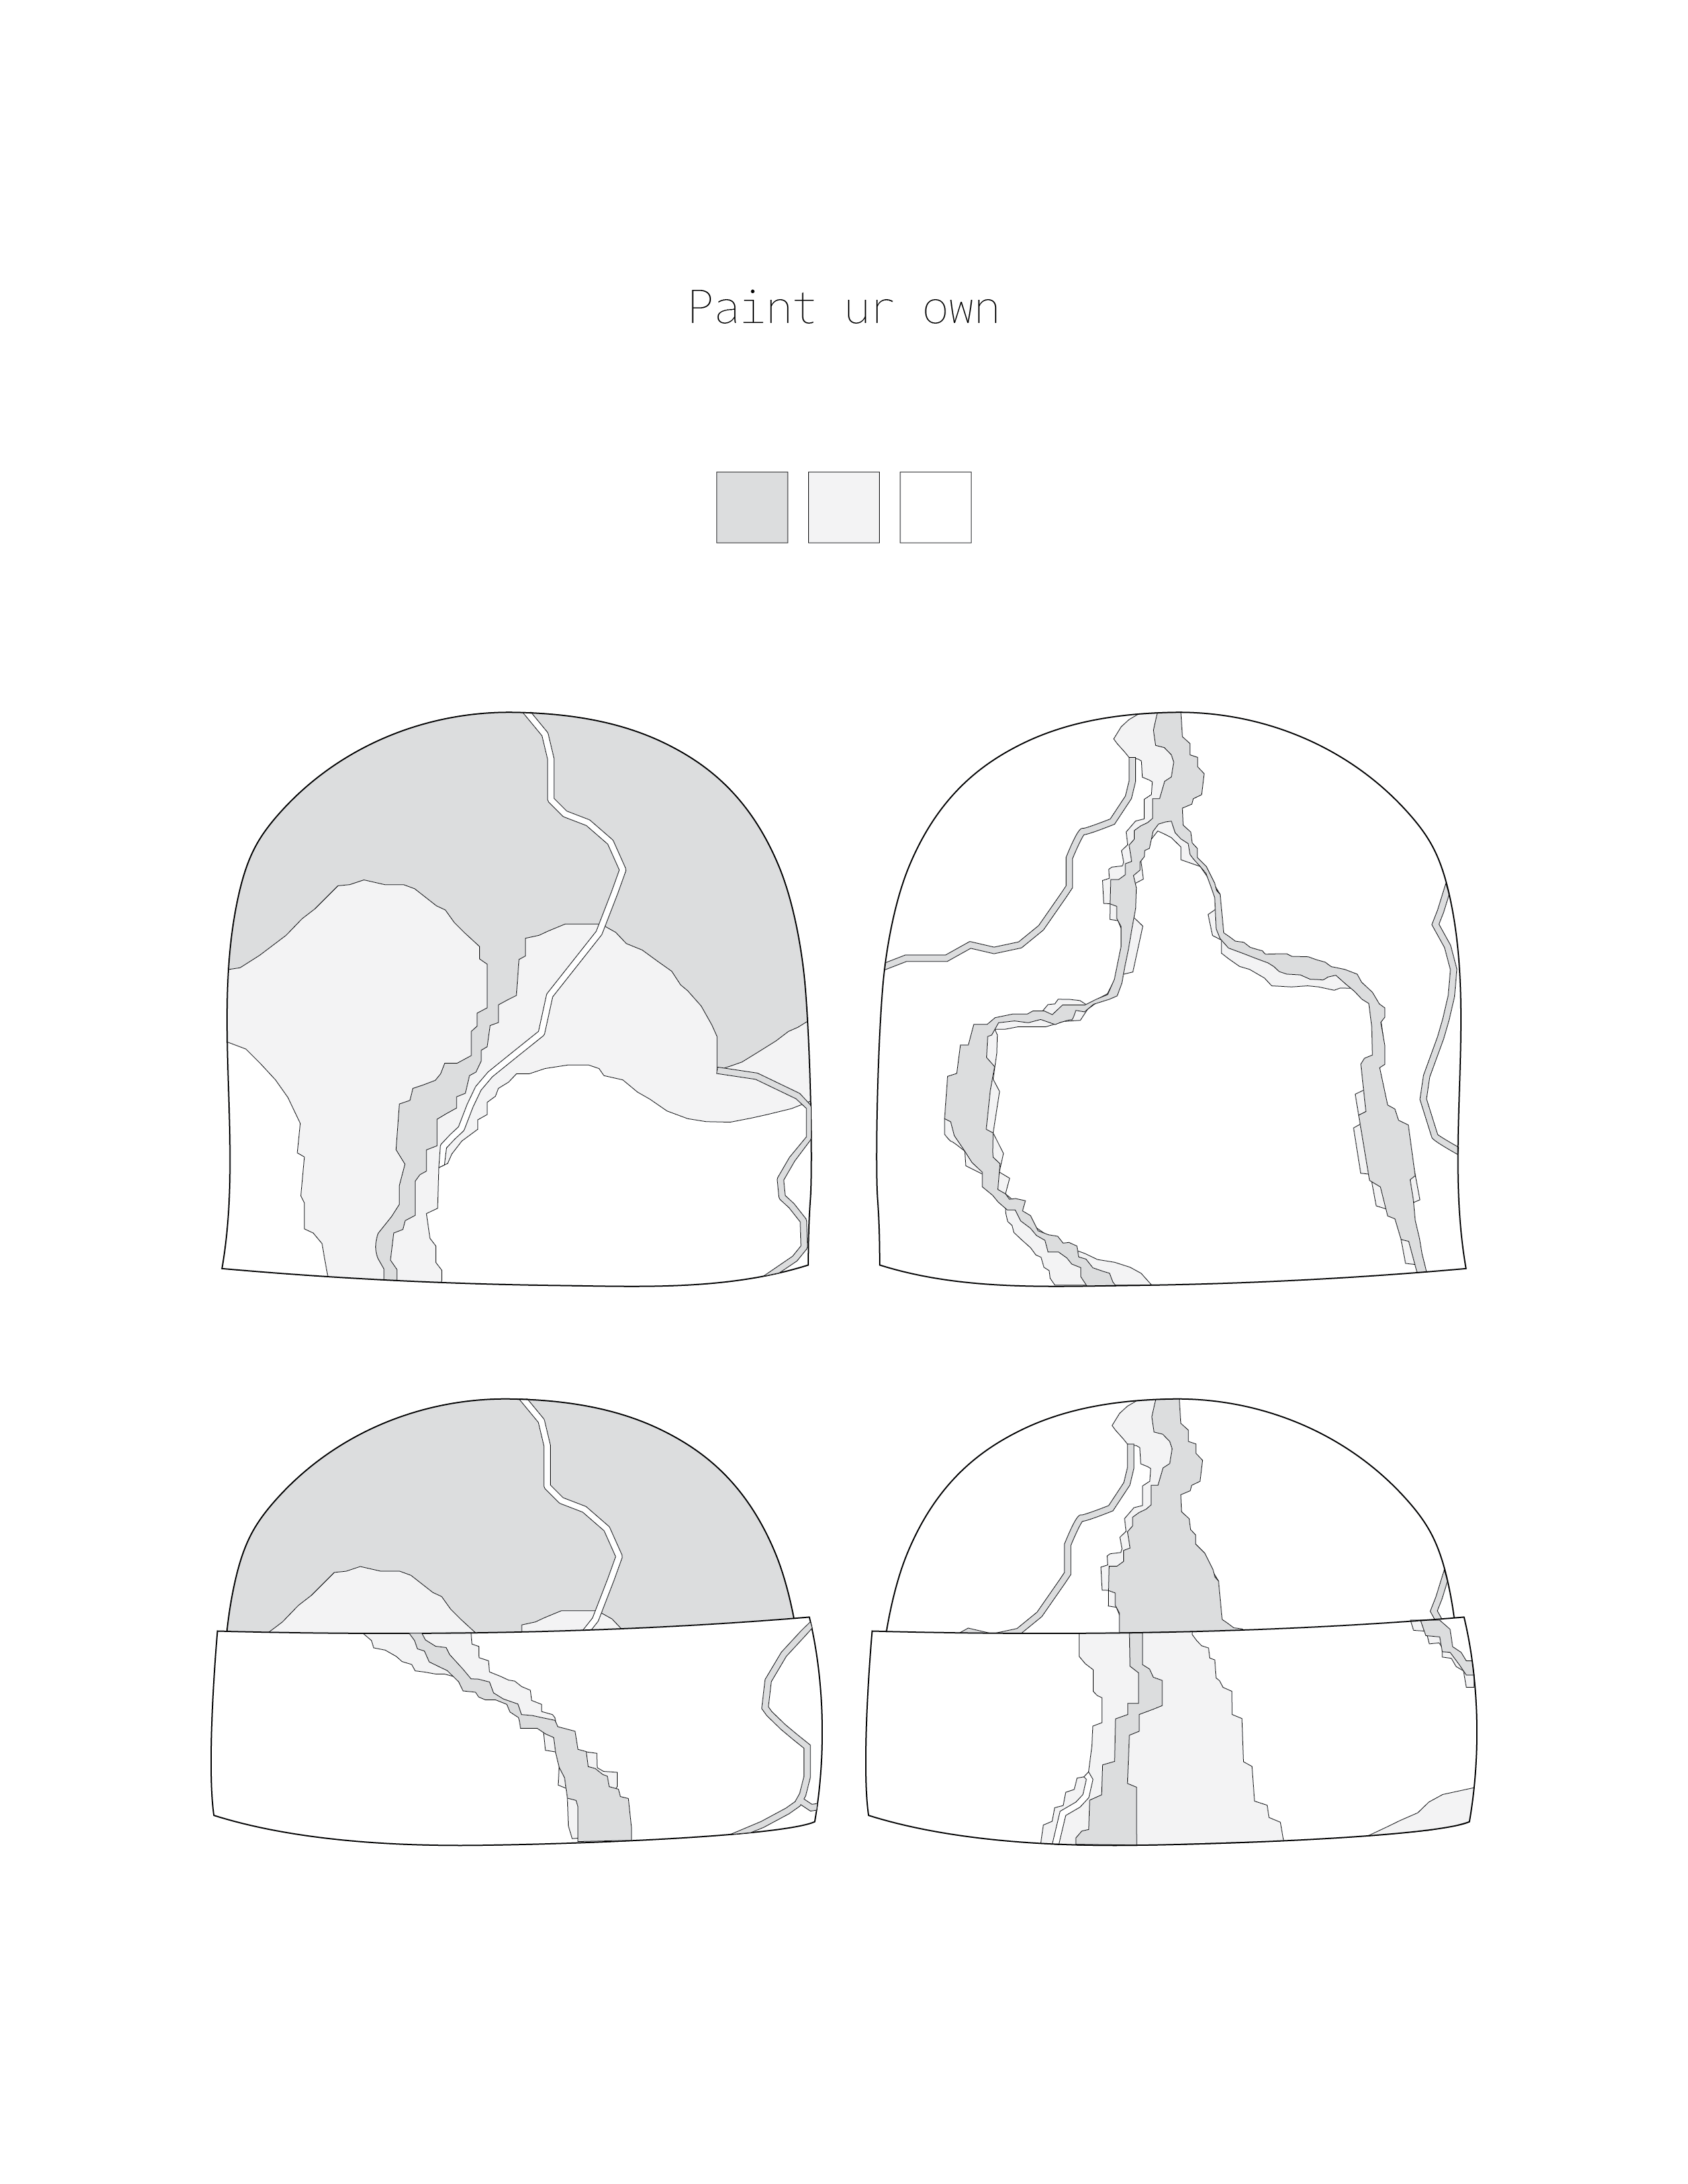
This PDF even includes a coloring page that you can print/download and fill in to plan your own colors!
I am so excited about this pattern and already dreaming up more watercolor-inspired intarsia designs. Whether you choose to cast on Marble or reading this has convinced you that intarsia is NOT and never will be for you, I hope you found it helpful!
